Blog Archives
A Map of Cool Ranch
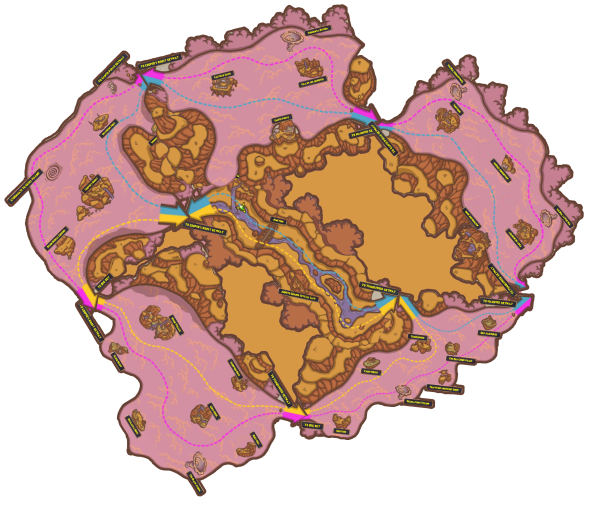
And when I say “A Map of Cool Ranch,” I mean a map of Cool Ranch. All of Cool Ranch.
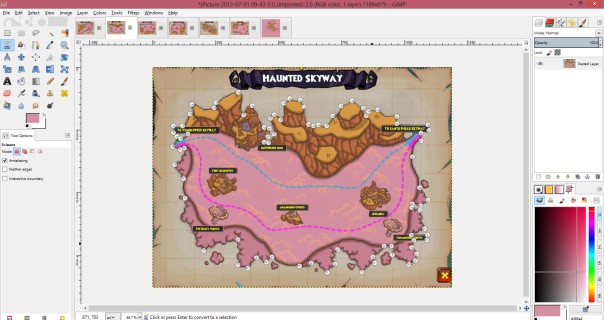
That was really fun to make! What I did was I took screenshots of all the skyways’ maps, then put them into GIMP. I selected the map part, which means I didn’t select the parts around the edges, then did Select > Invert to select only the bars on the sides. I deleted those then (after inverting the selection again) did Image > Crop to selection. After that, I selected only the skyway part, no map wanted. That was pretty hard.
I also had to fill in the spaces where the green arrow was, which was accomplished by some penciling in pink and some copy-pasting of the windlanes (with the exception of Arroyo Grande). Then I pasted them onto the main image and rotated them as necessary. After I had done this for all six skyways, I made sure everything fit together correctly, cropped down the image, filled in blank spots with empty pink skyway, and outlined everything with dark brown. Voila!
I got the idea of this reading the May 2013 Pirate101.com newsletter where it had a link to a Pirate101 Central thread where the user Arcane had already made one of Skull Island. Here is the link to that thread! Thanks for reading!
How To: Make Your Blog Glow!
 So, in this post, I’m going to have a short tutorial about how you can start editing images with the GNU Image Manipulation Program, or GIMP, for short. I believe this only works for Windows. Sorry!
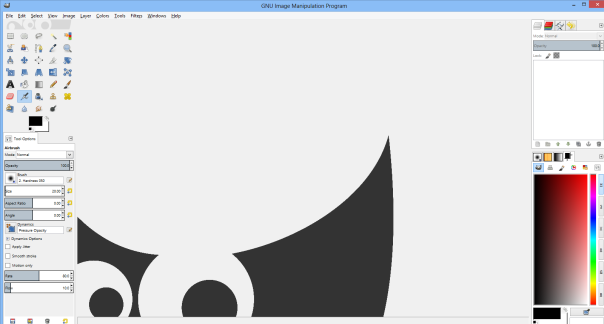
1. First, you’ll need to download GIMP. When you open it up, screen that looks like this or similar to this. P.S. We’ll be practicing “glowing” with a glowing P101 symbol! 😀
2. If it’s all separate windows and you want to combine them like shown above, navigate to one of the upper menus (File, Edit, Select, etc) and choose Windows ➜ Single-Window Mode. (Picture)
3. Now all the windows will be connected together. In my opinion, it’s easier to manage that way. But now, to make your first picture! Go to File ➜ New to make your first image. It will ask you what the dimensions you want are. For what we’re doing, you should make a 400 x 400 pixel image. (Picture)
4. Make sure those three values are correct. You should get a square white screen, which is perfect! This is your canvas. Go to this link then right click and press Copy image. (Picture)
5. Go back to GIMP and go to Edit ➜ Paste or press Ctrl + V on the keyboard to paste on the P101 symbol. It should be right in the center. (Picture)
6. This looks kind of bad, doesn’t it? Don’t worry, we’re not done. Go to the Layers tab on the right side of your screen, and right click the “Floating Selection.” Choose “To New Layer.” (Picture)
7. If you don’t know what “layers tab” I’m talking about on the right, do this. (Picture)
8. Then it will appear on the right side of your screen, and follow the instructions above. Now, since the P101 symbol is on its own layer, you can get rid of that ugly black part. Choose “Select By Color” on the left; (Picture)
9. Then click on the black, it will select it all. Press Delete on your keyboard and it will remove all of the ugly black stuff. Then go to Select ➜ None. Then go back to your handy Layers widget and right click the “Pasted Layer” then press “Alpha To Selection.” This will select all of the Pirate101 logo. (Picture)
10. Now, create a new layer by going to Layer ➜ New Layer. Name this layer “Glow.” Leave everything else how it is. (Picture)
11. After that, go to Select ➜ Grow, then increase the selection by 2. This is so the glow will go outside of the symbol. (Picture)
12. Then pick any color… (Picture)
13. …And use the fill tool to fill in the area you selected. (Fill tool found in top left toolbox.) Now use the Select ➜ None from step 9 and your picture should look like this. (Picture) If it doesn’t, go back and revise the other steps. We’re not done!
14. Go to Filters ➜ Blur ➜ Gaussian Blur and make sure the numbers are “linked”. (Picture) Fill them in with anything you want, the bigger the number, the bigger the glow. Here’s your end product! (File ➜ EXPORT)
Sorry about the white dots around the edges of the “P101”! I did not upload the original image. You can use this glow technique with almost anything! You can even use it with black to make it look like shadow. Have fun with it!
